The RoboTask Service Manager is a separate utility within the installation package of RoboTask. The RoboTask Service Manager allows to install the RoboTask Service and perform the necessary initial settings of the service.
The functions of the service setting are separated according to their subjects onto different tabs.
The functions of installing, starting and stopping of a service are located on this tab. It is also possible to change system settings of the service and to get access to the main window of the service here.
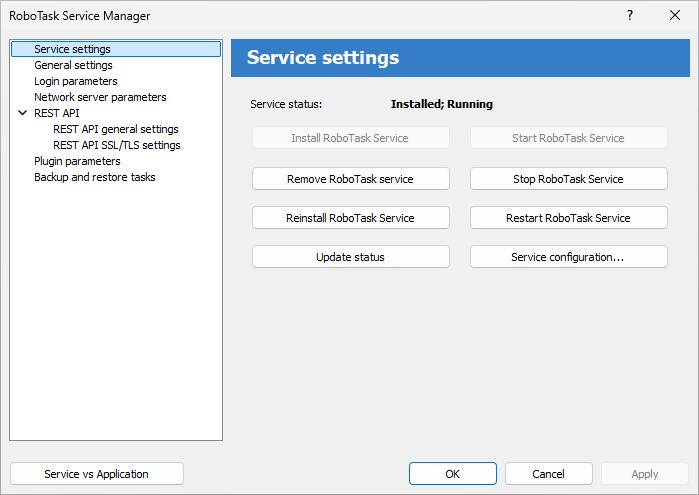
Install RoboTask Service.
Installs the RoboTask Service in your system if the service has not installed yet.
Remove RoboTask Service.
Removes the RoboTask Service from a local system.
Reinstall RoboTask Service.
Reinstalls the service with default system settings.
Update Status.
Updates displaying of service status in the window.
Start RoboTask Service.
Starts the RoboTask Service on a local computer.
Stop RoboTask Service.
Stops the RoboTask Service on a local computer.
Restart RoboTask Service.
This operation stops the RoboTask Service, pauses for a few seconds and then starts the service again.
Service configuration
You can perform system settings of the service here as well as in the system Service Manager (Control Panel => Administrative tools => Services). For ease of operation, the settings of the RoboTask Service are included into this utility.
Start Interactive Service Detection
This function is destined specially for operation systems Windows Vista and the later ones (Windows 7, Windows Server 2008, Windows 8). The function allows to start and stop Interactive Service Detection
The RoboTask service is an interactive service. This means that a user can get an access to the service window and do settings interactively. In the OS Vista (and in later OSs) the system hides interactive services by default. To get the access to the system window it is necessary to start the system service Interactive Service Detection. After that you can get an access to the session SYSTEM and then work with the window RoboTask Service interactively.
This option is not available on Windows 10 and later
Allow Interactive Services.
To get an access to the service window, interactive services must be allowed in the system. In the OS Windows 7/ Server 2008 R2 (and previous OS) interactive services are allowed by default. In systems beginning from Windows 8 interactive services are forbidden by default.
This option does not prevent RoboTask service from working. The service starts and works normally in any case. But if the option is off, you cannot get any access to the main window of the RoboTask service. If interactive services are not allowed, you will get an error when starting Interactive Service Detection.
To allow interactive services in the system it is enough just to switch on this checkbox.
This option is not available on Windows 10 and later
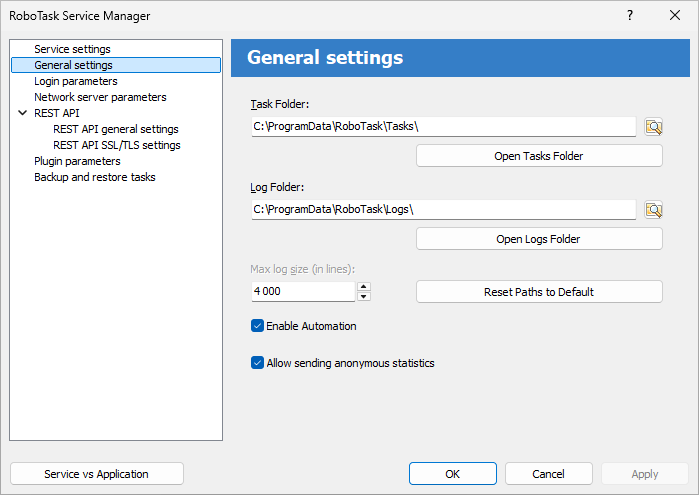
You can find general settings for the service on this tab:
•Location of tasks and logs.
•The maximum length of log-files (in lines).
•Switching on and off the automatic work of tasks.
•Allow sending anonymous statistics
You can also find these settings in the dialog Settings on the General tab.
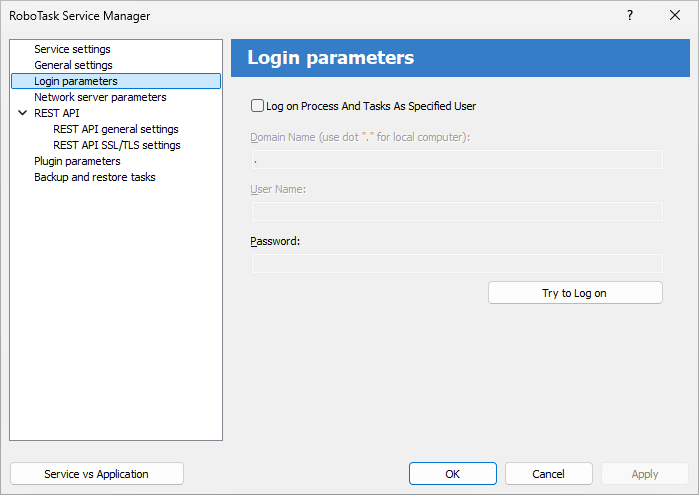
Logon Process as Specified User
Select this option if you want the RoboTask log on as Specified User and get its privileges.
Domain Name
Enter the name of the domain or server whose account database contains the specified UserName account.
User Name
Enter the name of the user account to log on to.
Password
Enter the password of the user account.
On this tab you can set up server parameters of RoboTask. Read more about client-server mode here.
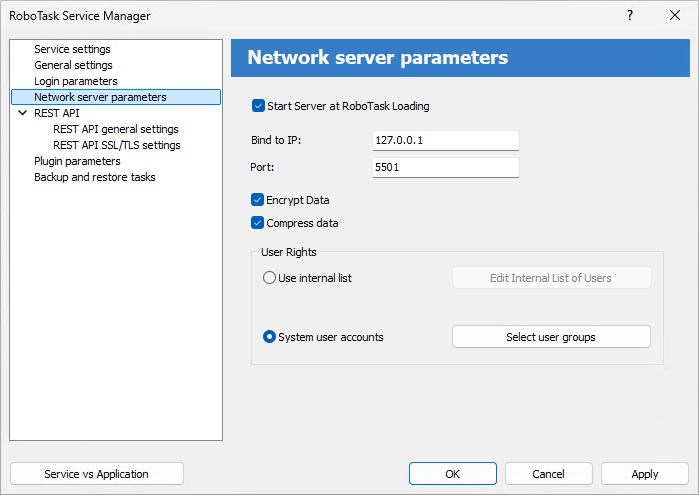
Start Server at RoboTask loading
It is on by default. Switch off this checkbox if you want to refuse from remote administration.
Bind to IP
By default this field is empty. This means that the network server is bound to all available addresses on the computer. The address 0.0.0.0 has the same effect. You can specify particular address. This is useful if the computer/server has several IP addresses.
Also you can specify local host address 127.0.0.1. In this case you can connect to server from local computer only.
Port
This is the number of a port, on which the server accepts connections. By default, it is 5500. If you use more than one instance of RoboTask at your computer, apply different ports to avoid conflicts.
For example: 5500 is for an application, 5501 is for a Service.
Encrypt data
This is the mode of traffic encryption. By default, it is on. The mode of ciphering is specified by server. A client is tuned on the mode of encryption automatically. RoboTask provides the traffic encryption with dynamic keys using CryptoAPI system functions.
Compress data
This is the mode of traffic compression. By default, it is on. The mode of traffic compression can be useful when connection is slow (for example, DialUp or GPRS). The mode of traffic compression (packing) is specified by server. A client is tuned on the mode of compression automatically.
User Rights
This is the check mode of user’s rights at connection. It is possible to choose between two modes of user checking:
•Use Internal list - When you press the button “Edit Internal List of Users” in this mode, you can define users, who have the right of connect to the server. This is just text in the form
USERNAME=PASSWORD
on every line.
For example:
admin=1234567890
At the checking of a user, the server inspects presence of the user in a list and correctness of a password.
•System user accounts - In this case RoboTask uses system user authentication. When selecting this authorization mode, be sure to specify which system groups the user should belong to. It is necessary to specify one or several groups. If the user does not belong to any of the specified groups, the authorization will fail, even if the authorization parameters are correct. For example, you can create a system user group "RoboTask users" and open access for users of this group.
If the user isn’t checked, the server returns an error and closes the connection.
By default, the System user accounts mode is on.
REST API (Representational State Transfer) provides some communication means (program interface) with RoboTask instance from python or JavaScript scripts using HTTP requests.
RoboTask REST API allows you to get information about RoboTask operation, get a list of tasks, as well as start or stop an individual task.
REST API server returns data in the form of JSON object. You can see the whole set of requests and also try them interactively using the API documentation (Swagger) function (see below).
To demonstrate how the REST API works, use the robotask_rest_api_demo.py script, which is located in the Demo sub-folder of the RoboTask folder.
REST API general settings
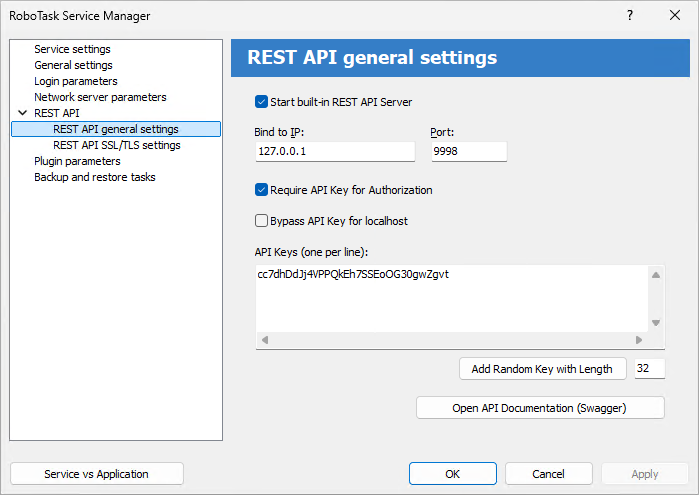
Start built-in REST API server
To start the REST API server, enable this check box. By default, the REST API server is not started. You can enable it if necessary
Bind to IP
Specify the IP address that the REST API server will use. By default, the REST API server uses the address 127.0.0.1.
The address 127.0.0.1 corresponds to localhost. In this case, you will only be able to access the server from a local computer.
Address 0.0.0.0 means that the server will use (listen to) all available addresses on the computer.
If the computer/server uses multiple IP addresses, you can specify one address to which the server will be bound.
Port
Specify the port that the REST API server will listen on.
For normal application mode, the REST API server uses port 9999
For system service mode - 9998.
You can specify any free and suitable port number.
Require API key for Authorization
Enable this checkbox if you want to authorize each connection. If you want to use REST API outside your local network, it is recommended to enable authorization mode.
Authorization on the REST API server is performed using API keys. An API key is simply a set of characters that is prescribed on the server. The provided API key must exactly match one of the registered keys. Otherwise you will get a "401, Unauthorized" error on any request
API key must be included in HTTP request headers.
Use the X-API-KEY header.
Bypass API keys for localhost
Enable this check box if you want to disable API key validation for local connections.
API keys
A list of keys defined on the server: one key per line. You can add strings manually or add a random string: specify the key length and click the "Add random key" button.
Open API documentation (Swagger)
Built-in API testing service. Swagger allows you to view and test all available REST API functions interactively.
Swagger runs in your default browser and shows all available REST API functions through the web interface. When testing a function, you will see the format of the request and response from the server.
To test the API key use the "Authorize" button in the upper right corner. After that specify the required API key and press "Authorize" button.
REST API SSL/TLS setting
TLS (transport layer security) - traffic encryption mode. If you want to use the REST API outside your local network, traffic encryption is a must. In local network mode, encryption is not necessary.
To enable traffic encryption mode, you need a certificate and a private key in PEM format.
You can use paid or free certificates (for example, here).
You can also create the so-called "self-signed" certificates. You can make self-signed certificates using OpenSSL or Powershell package. Read how to do it here or here.
You can also use a simple batch file (CMD or BAT). An example is shown below. If you have the OpenSSL package installed, simply run this file and answer the application questions.
The complete text of batch file:
rem You can get OpenSSL binaries here: https://slproweb.com/products/Win32OpenSSL.html
rem Apache httpd distribution: https://www.apachelounge.com/download/
rem Apache httpd contains OpenSSL binaries too
rem @echo off
set OPENSSLPATH=C:\Program Files\OpenSSL-Win64
IF EXIST %OPENSSLPATH% (
echo Using Apache at path %APACHEPATH%
"%OPENSSLPATH%\bin\openssl.exe" genrsa -out privkey.pem 2048
"%OPENSSLPATH%\bin\openssl.exe" req -new -x509 -config "%OPENSSLPATH%\bin\cnf\openssl.cnf" -key privkey.pem -out cacert.pem -days 365
) ELSE (
echo Please set OPENSSLPATH to a valid OpenSSL path (download it from https://slproweb.com/products/Win32OpenSSL.html)
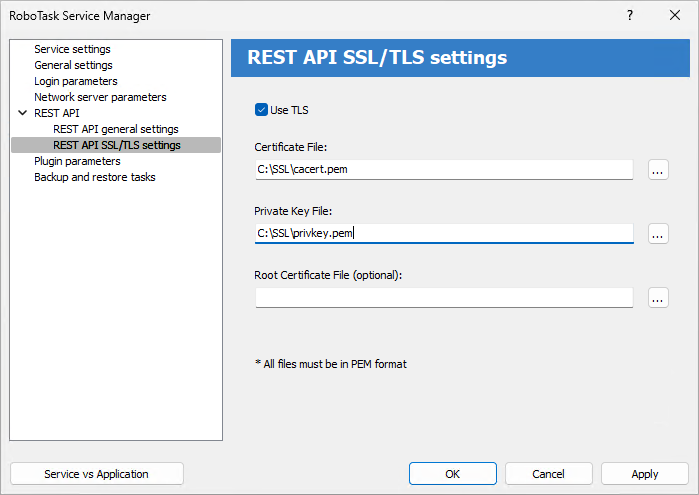
Use TLS
Enable this check box if you want to use encryption mode
Certificate file
Specify the name of the certificate file.
Private key file
Specify the name of the private key file
Root certificate file (optional)
Specify the file name of the root certificate. This field can be empty. For a "self-signed" certificate, leave this field blank.
All files must be in PEM format.
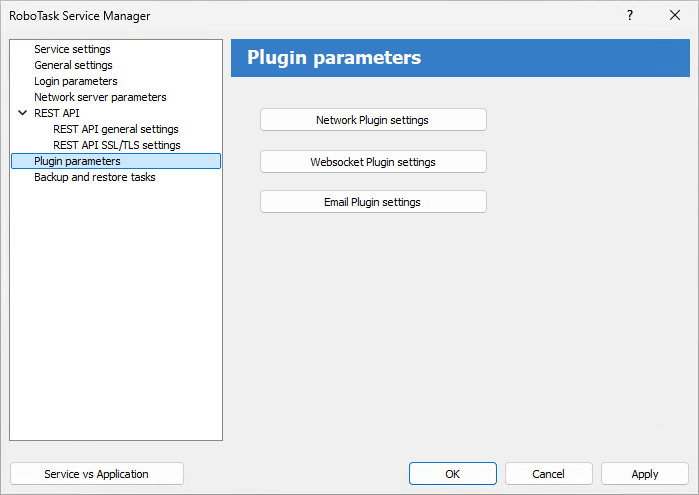
Network Plugin settinggs
The form is the same as the settings of the Network plugin.
WebSocket Plugin settings
The form is the same as WS Connection Manager
Email pluging setiings
The form of OAuth parameters editor for service
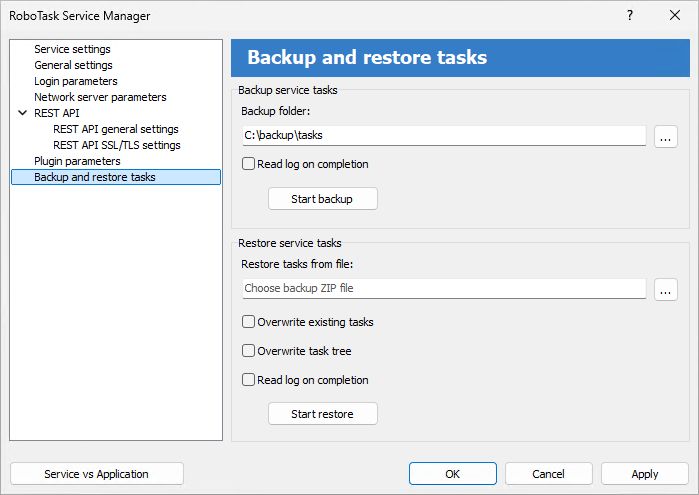
Backup service tasks
Backing up tasks consists of packing the current set of tasks into a ZIP archive. If necessary, it is possible to restore tasks from a saved archive.
Backup is performed using a predefined task launched in the environment of runtime module.
Backup folder
Select a folder to save the backup files. The default folder is in the user profile:
C:\Users\<User_Name>\RoboTaskBackup
If necessary, you can select another folder. The selected folder is saved for future work sessions.
The archive file name is generated automatically using the current date and time:
RoboTask- Service-Tasks-YYYYMMDD-hhmm.zip
where YYYYMMDD – date in "YYYYMMDD" format
Read the log when completion
Check this box if you want to read the task execution log.
Restore service tasks
Restoring tasks consists in unpacking tasks from a backup file into the tasks folder.
Restoration occurs with the help of a predefined task launched in the environment of runtime module.
When the task is restored, the RoboTaskNTService service is restarted.
Restore tasks from file
Select backup zip file
Overwrite existing tasks
If you want to overwrite existing tasks, then enable this checkbox.
Overwrite task tree
If you want to overwrite an existing task tree, then enable this checkbox.
Read the log when completed
Check this box if you want to read the task execution log.
![]() Related Topics
Related Topics
How to access RoboTask Service